🍕 Pizza Stone in Oven Preheat Time Calculator
Estimate pizza stone, baking steel, ceramic slab, or firebrick preheat time from material, thickness, size, oven temperature, starting temperature, rack position, oven type, target stone temperature, and batch recovery.
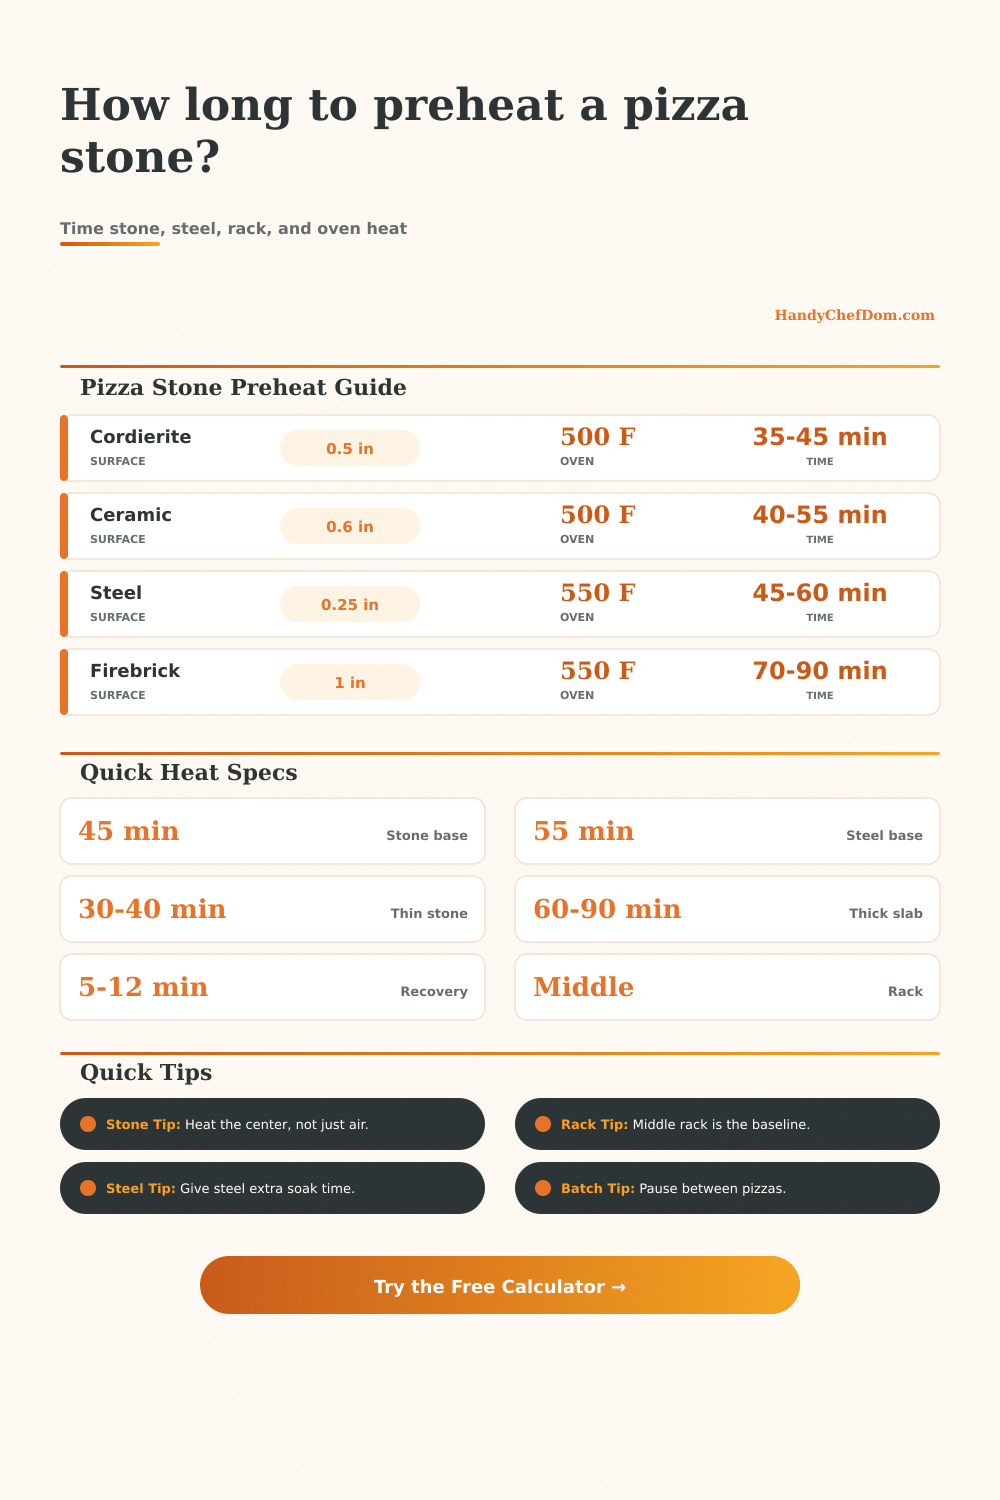
Use this for a room-temperature stone already inside the oven before preheating. A thicker or heavier surface can need a long heat soak after the oven beeps because the stone center lags behind the air temperature.
| Material | Common Thickness | Preheat Character | Multiple Pizza Recovery |
|---|---|---|---|
| Cordierite pizza stone | 0.4 to 0.6 inch | Moderate mass and forgiving heat transfer | Usually 5 to 9 minutes between pizzas |
| Ceramic stone | 0.5 to 0.8 inch | Slower center heating when thick | Usually 6 to 11 minutes between pizzas |
| Clay or terracotta | 0.5 to 0.75 inch | Gentle bottom heat with slower response | Usually 7 to 12 minutes between pizzas |
| Baking steel | 0.20 to 0.38 inch | High mass and very fast heat transfer | Usually 8 to 14 minutes between pizzas |
| Cast iron plate | 0.25 to 0.50 inch | Similar to steel but often thicker at edges | Usually 8 to 13 minutes between pizzas |
| Firebrick or deck tile | 0.75 to 1.25 inch | Very slow preheat with strong storage | Usually 5 to 10 minutes once fully soaked |
| Oven Set Temp | Stone Target | Thin Stone | Steel or Thick Slab |
|---|---|---|---|
| 425°F / 218°C | 390 to 410°F | 30 to 40 minutes | 45 to 65 minutes |
| 475°F / 246°C | 435 to 455°F | 35 to 50 minutes | 50 to 75 minutes |
| 500°F / 260°C | 460 to 485°F | 40 to 55 minutes | 55 to 80 minutes |
| 525°F / 274°C | 485 to 510°F | 45 to 60 minutes | 60 to 85 minutes |
| 550°F / 288°C | 510 to 535°F | 50 to 65 minutes | 65 to 95 minutes |
| 600°F / 316°C | 555 to 580°F | 45 to 60 minutes | 60 to 90 minutes |
| Rack Position | Heat Strength | Best With | Planning Adjustment |
|---|---|---|---|
| Bottom rack | Strong bottom element exposure | Stone, ceramic, firebrick | Can shorten preheat, but check bottom browning |
| Lower third | Reliable base heat | Most home-oven pizza stones | Slightly faster than middle rack |
| Middle rack | Balanced air and radiant heat | General pizza stone use | Use as the calculator baseline |
| Upper third | More top heat, less bottom storage | Broiler finishes and thin pizzas | Add a small soak for thick surfaces |
| Top rack | Very strong top heat | Steel plus broiler finishes | Watch the stone center and rotate carefully |
| Pizza Session | Door Open Time | Recovery Wait | Surface Note |
|---|---|---|---|
| One pizza | 10 to 20 seconds | No wait needed | Use the full preheat estimate before launch |
| Two pizzas | 15 to 25 seconds each | 5 to 9 minutes | Stone recovers faster than steel after light pizzas |
| Three to four pizzas | 20 to 35 seconds each | 7 to 13 minutes | Steel may need a steadier pause after wet toppings |
| Heavy toppings | 25 to 45 seconds each | 10 to 16 minutes | Moisture and mass pull heat from the surface |
| Pan pizza load | 30 to 60 seconds each | 12 to 20 minutes | Use fuller recovery for crisp bottoms |
You slide your pizza onto the stone, set the timer for 6 minutes, and wait while dough bakes at five-hundred degrees (beep, beep, beep). But what’s the issue? While outer edge of the stone feels warm, center remains cold.
Thermal energy moves faster through air different than through dense objects: That coveted crispness and those leopard spots on your pizza’s crust is trapped inside middle of whatever material you’re using as a baking surface. That’s where getting this preheat calculation right make all the difference. Transforming a poor home bake into one that looks closer to what you’d get from a pro.
Why Your Pizza Stone Needs More Preheat Time
That’s where this calculator (above) comes in: Plug your desired thickness and material into formula, and it do all the math for you, no more guesswork as to whether that extra-soaking period will make a difference or not. It factors in thermal properties of whatever stone you’re cooking on, whether it’s a lightweight cordierite slab or a hefty baking steel.
While the latter is crazy-fast at conducting heat, it also retains a lot of it, and therefore takes longer to fully saturate itself with energy. If you launch your pizza onto an unsaturated steel, all that retained heat are lost. No matter how long the steel has been waiting, your crust won’t get the heat it needs.
On the other hand, a thick ceramic stone heats gradually but retains its temperature more effectivly once it’s finally up to speed. The other piece that most home bakers don’t even consider, how many recipes talk about what temperature your oven should of be set to?. Is the starting temperature of your stone. Did you pull your stone out from a wet basement or a chilly garage? When it’s stuck there, it will start in forties or below, and take much longer for its temp to match the oven air.
The tool takes that into account: Does your stone sits in a cold place, like the counter? That affects how long things take to come up to temp, and it adjust the window to match. It also accounts for the kind of oven: Is it an electric one, which dries out the air more than a gas model does? Do you have convection fans (which make the surface warm faster but may not get actual stone up to temp as fast)?
When you have a hot surface but a cold center, things bakes unevenly (bottom first, then top), which doesn’t lead to good rising action for the center portion. The other hidden variable that will ruin your pizza night? It is recovery time. Opening the door releases heat from oven, lowering the air temperature inside. Then, placing a cold, wet ball of dough on a super-hot surface acts like a heat sink; it sucks energy away from the stone and uses it to cook top of the dough.
The calculator calculates how long it should take for the surface to recover its strength so you can throw another pie on there. You might bake three pizzas in a row. You better launch the second pie with some delay, or else the third will bake on a lukewarm surface, resulting in a soggy bottom that’s never going to crisp up.
It’s not just about preheating the oven at the start, it’s also about keeping up the thermal momentum during the whole session. The heat is subtly affected by where you place the stone inside the rack. Placing it in middle gives it even exposure. Move it down to the bottom of the rack and it will get closer to the heating element, preheating faster. However, you run the risk of burning the bottom before the cheese melt if you aren’t paying attention. That’s laid out nicely on the page, with reference tables outlining how various materials reacts to being placed at different levels on the rack.
What you don’t want is for the stone to be a passive object merely sitting in some hot air; you want the stone itself as the main source of heat. When you understand properties of conductivity and mass of whatever surface you bake on, you’ll stop cooking by time and start cooking by physics and feel. It’s not even about having a super-hot oven, exactly; rather, it’s about having a hot stone that gives heat back to the pizza faster then the pizza can absorb it.
And this all begins by letting your oven preheat just a little longer than you imagine it needs.