🍭 Icing per Cake Pops Calculator
Estimate candy coating, glaze, drizzle, dipping loss, crumb binder, and batch size from cake pop diameter, shell thickness, dip depth, and coating density.
The coating estimate treats each cake pop as a sphere, calculates covered surface area from dip depth, applies shell thickness and coating density, then adds drizzle, bowl cling, transfer loss, and reserve.
| Coating Type | Typical Density | Best Shell Use | Planning Note |
|---|---|---|---|
| Candy melts coating | 1.16 to 1.22 g/ml | Standard dipped shell | Often planned at 1.18 g/ml when fully melted. |
| Dark compound chocolate | 1.20 to 1.28 g/ml | Glossy thicker dip | Use slightly more weight for the same shell volume. |
| White compound coating | 1.18 to 1.25 g/ml | Opaque light shell | Can need a thicker coat to hide dark cake centers. |
| Tempered real chocolate | 1.22 to 1.30 g/ml | Thin snap shell | Thin shells coat well but demand careful fluidity. |
| Thin ganache glaze | 1.05 to 1.12 g/ml | Softer glaze finish | Works best as a thinner coating with less shell height. |
| Royal icing dip glaze | 1.25 to 1.35 g/ml | Firm sugar glaze | Heavier density, but usually applied thinner. |
| Coating Method | Surface Covered | Shell Thickness | Use In Calculator |
|---|---|---|---|
| Full dip coating | 95% to 100% | 1.2 to 1.6 mm | Set depth near 100% and use standard loss. |
| Three quarter dip | 70% to 80% | 1.1 to 1.5 mm | Good for exposed bottom display stands. |
| Half dip | 45% to 55% | 1.0 to 1.4 mm | Plan less coating but still keep cup depth workable. |
| Top cap dip | 25% to 35% | 0.9 to 1.3 mm | Use for decorative caps with separate sprinkles. |
| Double dip | 100% twice | 2.0 to 2.8 mm | Use when hiding dark crumbs under pale coating. |
| Drizzle only | 5% to 15% | Line weight | Set low dip depth and rely on drizzle per pop. |
| Cake Pop Size | Approx Crumbs | Full Dip Coating | Binder Range |
|---|---|---|---|
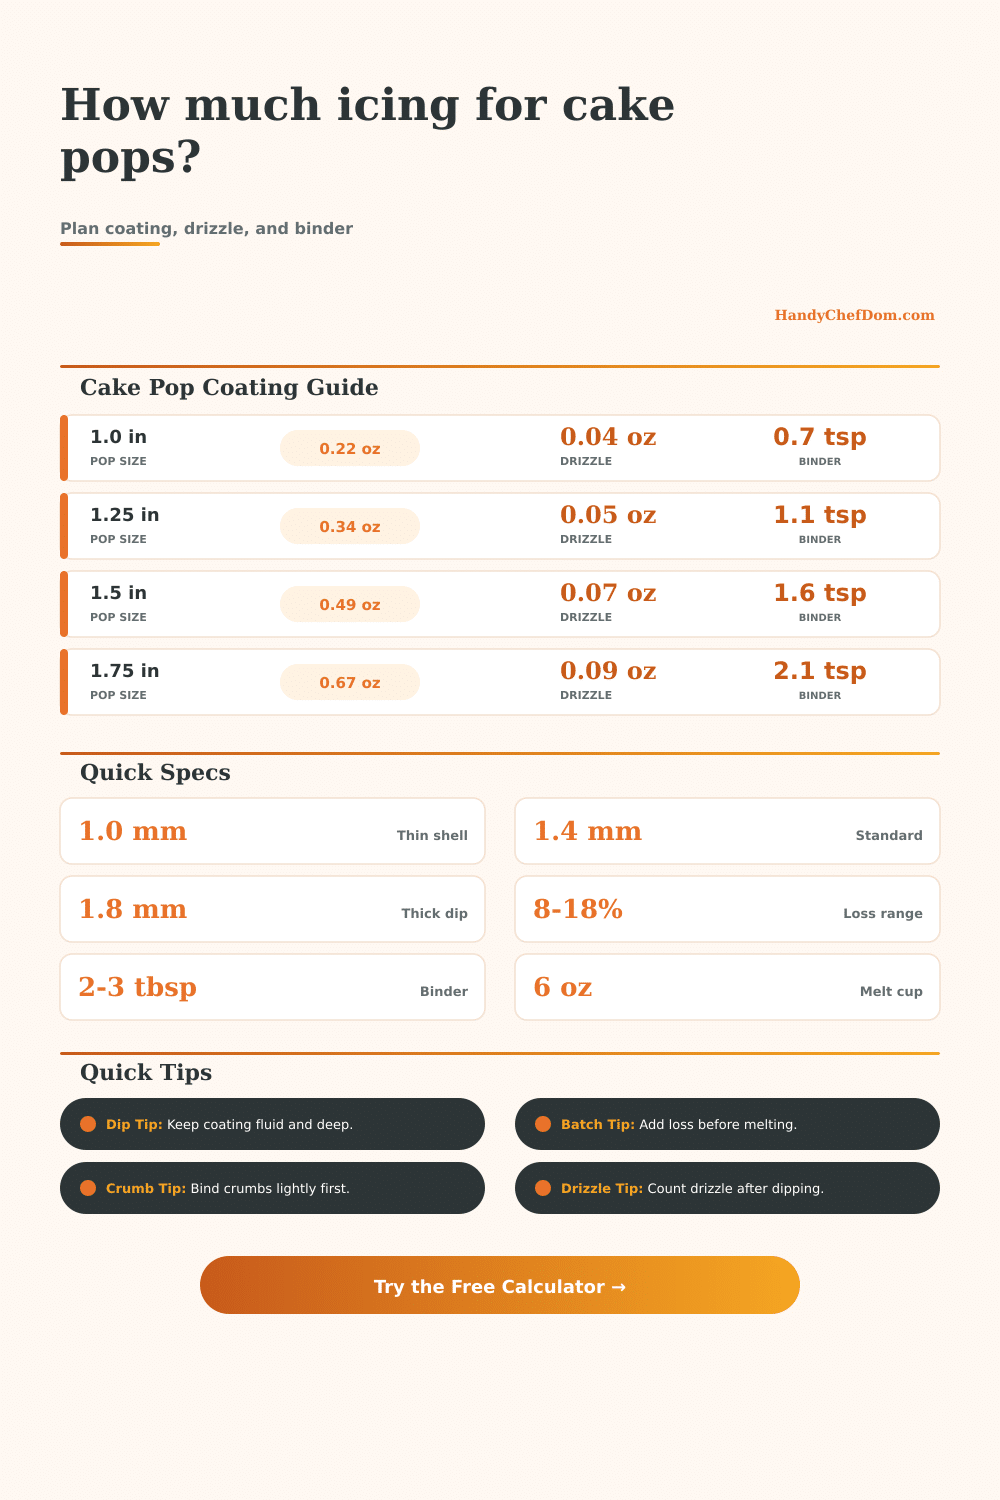
| 1.0 inch diameter | 0.27 cup per 6 pops | 0.20 to 0.25 oz each | 2 to 3 tbsp per cup |
| 1.25 inch diameter | 0.53 cup per 6 pops | 0.31 to 0.38 oz each | 2 to 3 tbsp per cup |
| 1.5 inch diameter | 0.91 cup per 6 pops | 0.44 to 0.55 oz each | 2.2 to 3.2 tbsp per cup |
| 1.75 inch diameter | 1.44 cup per 6 pops | 0.61 to 0.74 oz each | 2.5 to 3.5 tbsp per cup |
| 2.0 inch diameter | 2.16 cup per 6 pops | 0.80 to 0.96 oz each | 2.8 to 3.8 tbsp per cup |
| Mixed mini sizes | Average by diameter | Use weighted average | Bind by crumb cup total |
| Conversion or Yield | Imperial | Metric | Kitchen Use |
|---|---|---|---|
| Coating weight | 1 oz | 28.35 g | Small coating adjustments |
| Melted volume | 1 cup | 237 ml | Batch volume estimate |
| Binder volume | 1 tbsp | 15 ml | Frosting or icing binder |
| Large melt bag | 12 oz | 340 g | Common candy coating bag |
| Small melt cup | 6 oz | 170 g | Small color batches |
| Dipping loss | 8% to 18% | 8% to 18% | Bowl cling and stick drag |
It is a dream of shiny balls, painted to a shine and made with attention to detail. A dose of real world: Melting chocolate isn’t so much painting as it is an exercise in how liquids move. And those bags of candy melts? There’s no telling whether they’ll stretch to thirty-six pops or only a dozen.
The math of coating a ball turn out to be quite complex; it doesn’t follow the same rules we learned about surfaces in high school. Volume doesn’t simply scale up proportionally with surface area, which means a pop that’s only a tiny bit bigger need much more icing than your intuition tells you. Home bakers wing it, eyeballing their way through process, but the calculator above takes care of the geometry and lets you concentrate on style instead of arithmetic.
How to Calculate Chocolate for Cake Pops
And there’s a fundamental problem here: surface area. While a one-inch pop require very little coating, it still needs some. A one-point-five-inch pop feels just barely bigger in the hand, but with far more surface area to coat. Underestimate that geometry at your peril: Your dipping cup will run dry halfway through the batch, and the final dozen pops is sad and uneven-looking.
To compensate for this, the tool fits your exact diameter, plus the shell thickness you want. Usually, a shell is about one point four millimeters thick, thick enough to conceal the crumbs without being so thick they’ll show through when you snap it. Go too much thinner and you’re risking exposure of cake beneath. Go too much thicker and your supply lasts half as long. Economy or elegance: take your pick.
Choosing a different coating material change the density calculations entirely. For example, candy melts are forgiving; they melt easy and conveniently. They have a density that’s easy to work with and easier to account for. And real chocolate? It tastes better, but it’s also denser, requiring tempering (another level of complexity). The page includes a reference table explaining this: different materials will produce different results with the same shape. For example, you may think you’re getting the same weight no matter the material, but their densities affects the volume. That means a thicker, dense chocolate shell will weigh more then a lighter glaze that looks like it would weigh the same. Knowing this will ensure you purchase the right amount of product.
Loss is the silent budget buster. When I make a cake pop, some coating stick to my stick. Some falls off while dipping and gets stuck in the bowl. Other amounts collect in the dipping cup. To account for this dipping loss, the calculator includes a buffer, typically between eight and eighteen percent, depending on how viscous your melt is and how skilled you are. Omitting this step means you’ll always have just enough to get by. In the best-case scenario, your final pops will look great, but you’ll be left with a blob of hardened chocolate at the bottom of your bowl that is too thick to coat anything else. By reserving an appropriate amount, you guarantee that all of your pops will look their best. It is a little thing, but it makes a difference.
Then there’s binder. People gets tripped up here: Not enough and your pops won’t stay on the stick; too much, and they’re going to be all sticky-slippery-soft. We want something that will hold the crumbs without being too much. The tool calculates how much binder is required by measuring volume of crumbs, so you can find that sweet spot between texture and structure. More binder? Add more. Wet? Chill more/bake off longer. That’s where experience comes into play with those numbers. It provides a starting point, but your hands are the final judge. Roll that sucker into a ball, see what happens, tweak, repeat.
The drizzle is pure decoration, but it adds up fast. That little zigzag may look insignificant, but repeated 36 times, those little dribbles of icing weigh ounces and will increase your overall requirement. To allow for this, if you intend to finish with a heavy drizzle, the calculator factors that weight into total amount of chocolate you’ll have to melt. By splitting the structural coating from the decorative details, you can think about how much of each color you’ll need. You might use one shade as a white base to get good opacity and another as detail through a drizzle. Knowing exactly how much chocolate per step means no melting excess chocolate you don’t actualy want.
What do you have to have melted ahead of time? How many cups of melting coating? It gives you all of that information in the end product. That’s your total coating, how much per pop, and how much binder you’ll need. That takes the fear out of doing it. You know exactly what to have melted. And when.
When I say ‘what’ you measure, it’s not just the weight. It’s about the volume, the surface area, and the waste. And once you look at the numbers, there’s no more guessing. Do you have enough chocolate or not? Nope. That’s not even the question anymore. You’re planning a batch. Run through the calculator; follow the math; use the geometry to start; then build your shopping list from there. You’ll find yourself looking at perfectly proportioned pops, rather than at an empty bowl trying to figure out what happened to all of the chocolate. And the vision? Oh yes, it comes back again, but this time it’s backed by something that works.