🍚 Barley Water Calculator
Size cooking liquid for pearl, hulled, quick, pot barley, and broth-based barley by dry cups, grams, method, servings, and finished yield.
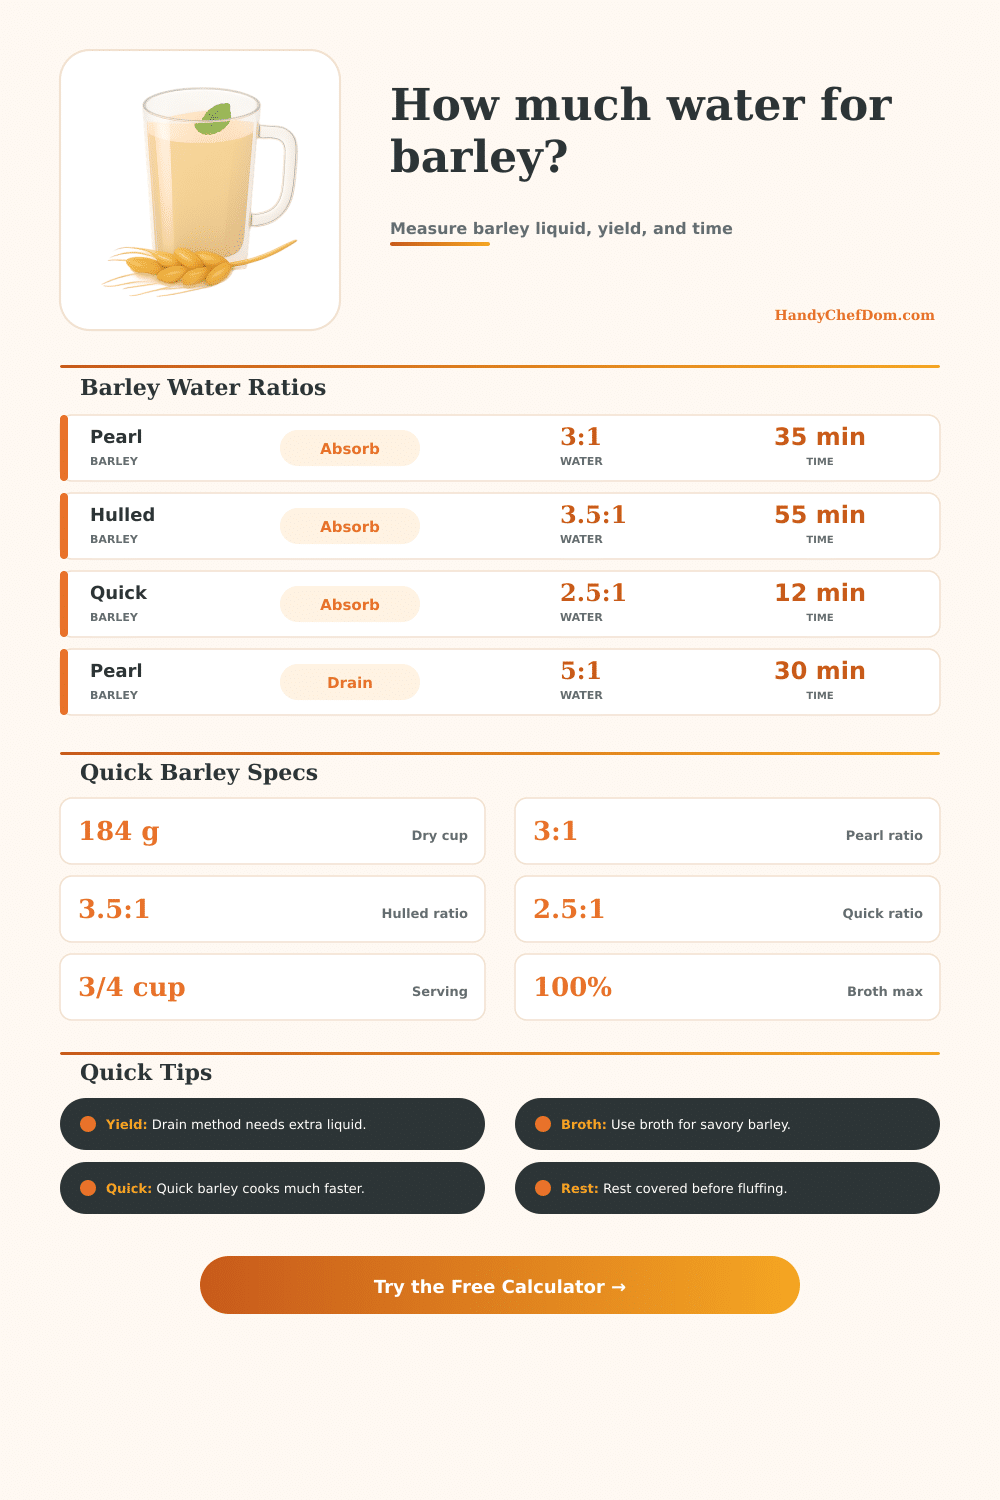
Choose whether you know dry cups, dry grams, or desired servings. Absorption keeps the liquid in the pot; drain method adds extra water so the barley can cook freely before draining.
| Barley type | Dry cup weight | Absorb ratio | Simmer time |
|---|---|---|---|
| Pearl barley | 184 g | 3 cups liquid | 30-40 min |
| Hulled barley | 190 g | 3.5 cups liquid | 50-65 min |
| Quick barley | 160 g | 2.5 cups liquid | 10-15 min |
| Pot barley | 185 g | 3.25 cups liquid | 40-50 min |
| Scotch barley | 182 g | 3 cups liquid | 35-45 min |
| Black barley | 188 g | 3.5 cups liquid | 45-55 min |
| Barley flakes | 96 g | 2 cups liquid | 5-8 min |
| Sprouted barley | 175 g | 2.75 cups liquid | 25-35 min |
| Method | Liquid logic | Best use | Yield note |
|---|---|---|---|
| Absorption | Keep all liquid | Bowls and sides | Most predictable |
| Drain | Add 65% more | Cold salads | Pour off extra |
| Soup or stew | Add 35% more | Brothy dishes | Liquid stays loose |
| Pilaf | Slightly less | Covered pan sides | Rest to finish |
| Dry barley | Pearl liquid | Hulled liquid | Cooked yield |
|---|---|---|---|
| 1/2 cup | 1 1/2 cups | 1 3/4 cups | 1 1/2 cups |
| 1 cup | 3 cups | 3 1/2 cups | 3 cups |
| 1 1/2 cups | 4 1/2 cups | 5 1/4 cups | 4 1/2 cups |
| 2 cups | 6 cups | 7 cups | 6 cups |
| 3 cups | 9 cups | 10 1/2 cups | 9 cups |
| 4 cups | 12 cups | 14 cups | 12 cups |
| Serving plan | Cooked amount | Dry barley | Typical liquid |
|---|---|---|---|
| Side for 4 | 2 cups | 2/3 cup | 2 cups |
| Bowls for 4 | 3 cups | 1 cup | 3 cups |
| Main for 6 | 6 cups | 2 cups | 6 cups |
| Meal prep 8 | 6 cups | 2 cups | 6 cups |
| Potluck 12 | 9 cups | 3 cups | 9 cups |
| Event 20 | 15 cups | 5 cups | 15 cups |
Cooking with whole grains makes you nervous. Why? Because you can’t just rely on the clock; you has to watch for visual cues and let it rest. If you’re doing barley, you put some into a pot, add water, and hope for the best: Did the grain cook through, or have you got yourself a mushy mess? Usually it’s one variable: how much liquid to use compared to amount of barley. Home cooks tend to wing it, but that variable is not as hard to figure out then it may seem.
It’s basic arithmetic. The calculator up top does that math for you, if you tell it what kind of barley you’re using and how you plan to cook it. You won’t have to stand in front of the pot, furiously trying to calculate conversions.
How to Cook Barley Properly
That’s where things get tricky: Depending on what kind of barley you’re using, it could have a different cooking experience. All barley are technically a grain. However, some types has their outer layer (known as bran) stripped away; this is called pearl barley. This makes it lighter and quicker-cooking than barley with its hull intact (hulled barley). Because of this hull, hulled barley takes much longer and uses far more water to cook until tender. Cooking them identically results in chewy hulled barley and mushy pearl barley.
To make up for such variations, the appliance figures out the ratios itself, depending on grain you choose. For instance, it knows fast-barley doesn’t need to stand in water for quite as long since it’ll be halfway to cooked anyway. Denser kinds of barley does. So if you mess up the ratio, you ruin the dish before timer even rings.
How it is cooked is also important. For most grain-based dishes like sides and bowls that you want to be nicely soaked with sauce, the default is “absorption,” which means you cook the grain until all liquid has been absorbed, resulting in a chewy bite. If you’re looking for something more al dente (like a cold barley salad), or just prefer a firmer snap, go for the “drain” method. This means you add much more water than the absorption ratio recommends, knowing that once done cooking you’ll drain away some of that extra water. In that case, many cooks top off the pot to little and end up with gunky, gluey rice/grains.
The calculator differentiates between these two scenario, so you don’t need to remember different formulas depending on the recipe. When drain is called for, it will adjust total amount of liquid needed so that there will still be plenty of volume left over after cooking; specifically, enough for the grains to swim around freely.
A second wrinkle is using broth over water. Replacing the water with stock doesn’t merely change the taste… It changes the way you consider what kind of yield you’ll get. More broth yields something more savory and more cohesive. Using less broth keeps it neutral so you can pair it with sweeteners or strong dressing ingredients. The amount of broth determines the balance there. It’s a subtle option, but like the simmer time, it defines the dish’s character.
The age of the grain affects how it absorbs liquid, as older barley will absorb differenty. Your stove’s heat output also matter. You can tweak the buffer percentage to match. Adding some liquid insurance ensures against the possibility of dryness at the end.
Barley comes in many forms, with cooking times ranging from as little as half an hour (pearl barley) up to an hour or even longer (hulled). Those are ballpark figures; the timer on your stove won’t be very reliable compared to what you see happening in the pan. When those grains has softened and lost their opaque interiors, they’re ready. Covering the pot and letting it sit off the heat will complete the process without reducing all the barley to a goopy mess. It’s important not to rush this stage; that rest time helps ensure tender grain.
But at the end of the day, a measure of barley water isn’t rocket science. It is an understanding of when things could of gone wrong, but more importantly, it is having enough knowledge to fix them. Once you grasp what kind of grain requires what volume of liquid, your plans for how to serve it will affect these requirements, giving you a predictable cooking process.
From there, no worries, just taste. And the tool only takes off the difficulty of the learning curve. It provides a solid place to begin so that you can turn your attention to enjoying what you’ve made.