Ground Coffee Per Cup Calculator
Estimate ground coffee by brew method, cup count, cup size, grams per liter, strength, grind, and tablespoon density.
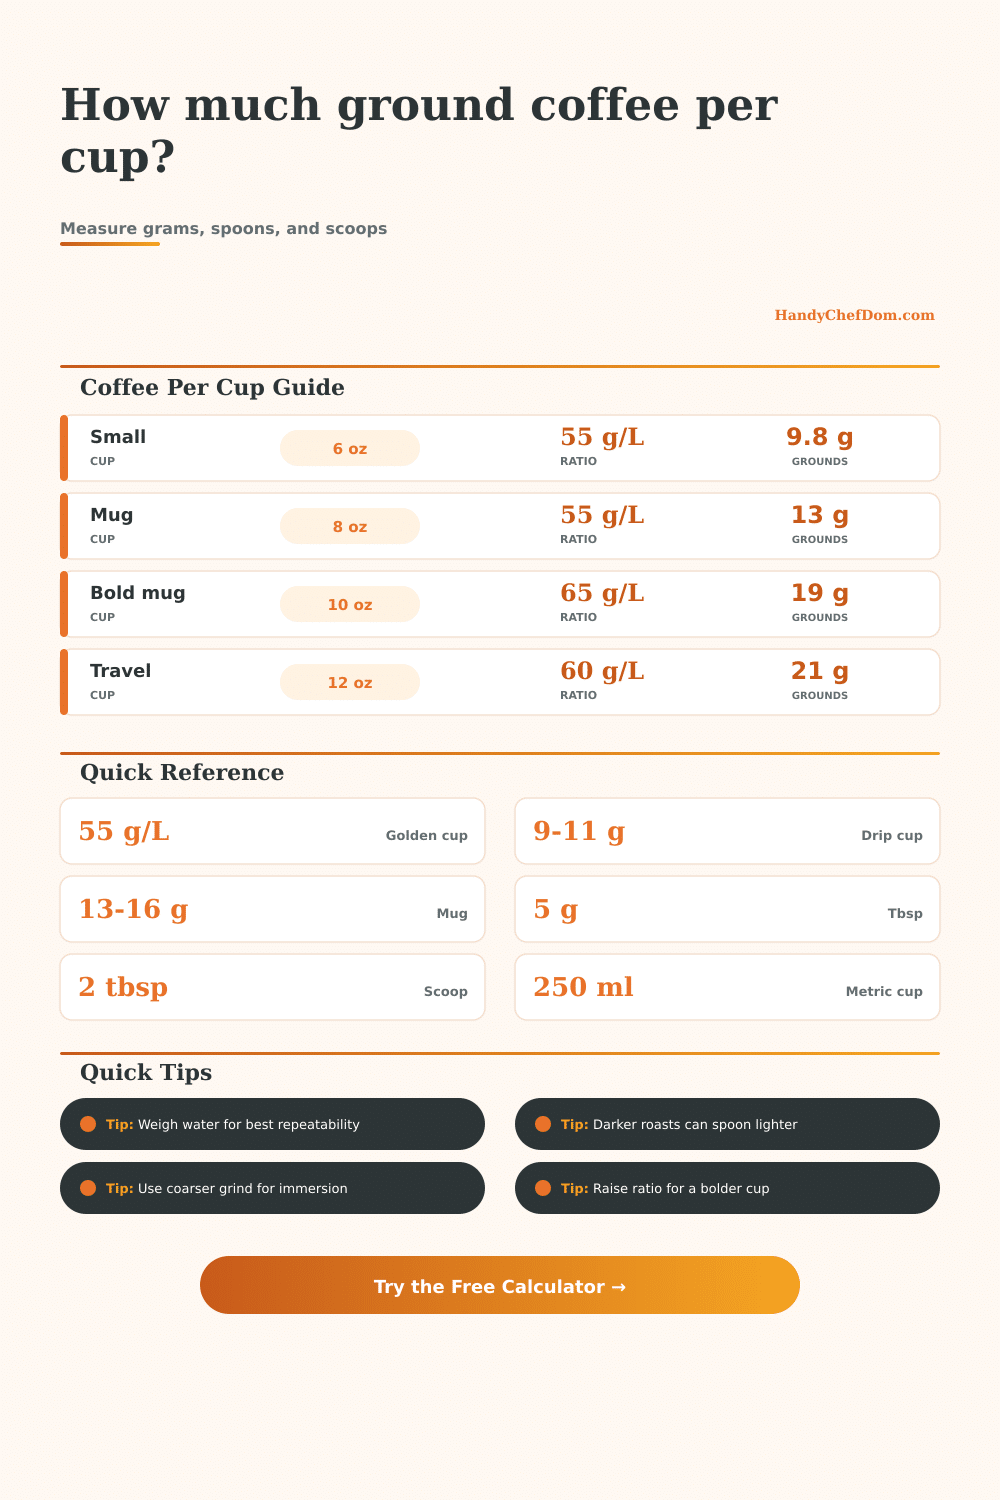
| Cup size | Water volume | 55 g/L balanced | 65 g/L bold |
|---|---|---|---|
| 5 fl oz coffee-maker cup | 148 ml | 8.1 g, about 1.6 tbsp | 9.6 g, about 1.9 tbsp |
| 6 fl oz traditional cup | 177 ml | 9.8 g, about 1.9 tbsp | 11.5 g, about 2.2 tbsp |
| 8 fl oz mug | 237 ml | 13.0 g, about 2.5 tbsp | 15.4 g, about 3.0 tbsp |
| 10 fl oz large mug | 296 ml | 16.3 g, about 3.1 tbsp | 19.2 g, about 3.7 tbsp |
| 12 fl oz travel mug | 355 ml | 19.5 g, about 3.8 tbsp | 23.1 g, about 4.4 tbsp |
| Brew method | Typical ratio | Grind starting point | Best use in calculator |
|---|---|---|---|
| Auto drip | 50 to 60 g/L | Medium | Daily pots and coffee-maker cups |
| Pour-over | 58 to 65 g/L | Medium-fine | Manual cups with clear flavor |
| French press | 60 to 70 g/L | Coarse | Immersion brews with fuller body |
| Aeropress-style | 65 to 85 g/L | Medium-fine | Shorter, stronger single cups |
| Moka pot | 90 to 120 g/L | Fine | Small strong cups, not espresso yield |
| Cold brew concentrate | 100 to 140 g/L | Coarse | Concentrate that gets diluted later |
| Grounds style | Typical g/tbsp | 2-tbsp scoop | Calculator note |
|---|---|---|---|
| Coarse ground | 4.6 to 5.0 g | 9 to 10 g | Often lighter by spoon volume |
| Medium ground | 5.0 to 5.4 g | 10 to 11 g | Good default for drip coffee |
| Medium-fine ground | 5.4 to 5.8 g | 11 to 12 g | Useful for pour-over and Aeropress |
| Fine ground | 5.8 to 6.4 g | 12 to 13 g | Use for moka or fine brewing styles |
| Batch | Water | Balanced 55 g/L | Bold 65 g/L |
|---|---|---|---|
| 2 mugs, 8 fl oz each | 473 ml | 26 g, about 5 tbsp | 31 g, about 6 tbsp |
| 4 cups, 6 fl oz each | 710 ml | 39 g, about 7.5 tbsp | 46 g, about 9 tbsp |
| 8 cups, 5 fl oz each | 1.18 L | 65 g, about 12.5 tbsp | 77 g, about 15 tbsp |
| 10 cups, 5 fl oz each | 1.48 L | 81 g, about 15.5 tbsp | 96 g, about 18.5 tbsp |
| 1 L carafe | 1.00 L | 55 g, about 10.5 tbsp | 65 g, about 12.5 tbsp |
In the morning, do you ever question whether or not there is enough coffee in that scoop? Without proper measurements, coffee has become more of an art for most: it’s all based off hazy intuition from inside your kitchen. It’s going to be either too watery or you’ll waste some precious bean. The ratio is what make the difference; your morning routine becomes something consistent instead of a coin toss.
This brings me to my next point: The name of the game begins with word cup. Most drip coffee makers considers a “cup” to be just 5 or 6 ounces. But an ordinary measuring cup are eight fluid ounces. If you’re not careful, this mismatch will throw off your brew by almost half. You assume that your machine’s definition of a “cup” matches the size of the vessel into which you’re pouring water, and end up putting in enough water for four large mug when you thought it was for four small cups. Because the machine definition doesn’t align with the size of the vessel, it’s all too easy to under-brew.
Why You Should Measure Your Coffee by Weight
The reason for this has to do with weight. Depending on how coarse or fine your grind is, the exact same amount (e.g., a “tablespoon”) can be very different volume. For example, a level tablespoon of fine espresso powder will weigh far more then a heaping tablespoon of coarse grounds. Because you’re spooning by volume, you’re essentially taking a guess about the density of the particular bag of beans. Switching to measuring by gram remove the variable of roast profile and texture of the beans from the equation. Whether it resembles gravel or sand, when you measure out your coffee by weight, you know precisely what’s going into the water.
Beyond the brew method, the right ratio also depend on which equipment you are using. For example, if you use an immersion brew method (French press), you’ll want slightly more coffee by weight than say, a quick-flow pour-over. You will get more extraction from your grounds because they are in contact with the water longer. However, you don’t want to overdo it, as the surface area need some space to pull out those good flavors. Fifty five grams per liter seems to be a happy medium for most filters and is a great place to start if you’d like a clean cup, letting the origin of the bean shine through. Want something a little stronger? It makes sense to increase that a bit up to about 65 grams per liter. Once you input how much water you’re using into the calculator, all the math is done for you; saving you time calculating by hand.
The other unseen variable that catches people off guard at first is how dense a table spoon is. Typically, a level teaspoon (one tablespoon) of medium ground coffee will weigh approximately 5 grams, although some darker roasts are actualy slightly less heavy/voluminous than others due to their nature to expand during the roasting process. Conversely, light roast tend to be slightly denser and thus heavier by volume. So if you brew with a consistent number of spoons regardless of roast level, you may find yourself with a weak cup when brewing light roasts, or a muddy cup when brewing dark roasts in a French press. By using the density input as a way to adjust for your particular bean, you’ll end up with very steady consistency.
But there’s another trick: adjusting strength. Strength adjustments offers a simple way to tweak the output without changing the base recipe. With a little extra coffee, say, 10 or 20 percent (you don’t simply increase strength). Instead, you may pull back some of the acidity and highlight any earthiness or chocolate in the flavor profile. That allows you to use light roast coffees that might be too bright by themselves. In other words, you are adjusting it to your taste instead of chasing a perfect number.
To make cold brewed coffee, you have to think about it differently. The slow extraction over hours requires far more coffee for every liter of concentrate, sometimes twice as much if not three times as much coffee. You can then dilute it and dial in the perfect strength for your preference on ice (or even milk). If you try to use hot-coffee-to-water ratios for cold coffee, you’re just going to end up with something weak and flavorless.
In the end, it comes down to control. You have control over the variables that make a difference. You have control over whether this morning’s pot tastes the same as yesterday’s. You will no longer wonder. You would of no longer second-guess yourself. Because once you know what you want and you’re dialing in your own process to get it, you have confidence, and that peace of mind is worth all the trouble of measuring out your beans and fiddling with your ratios.